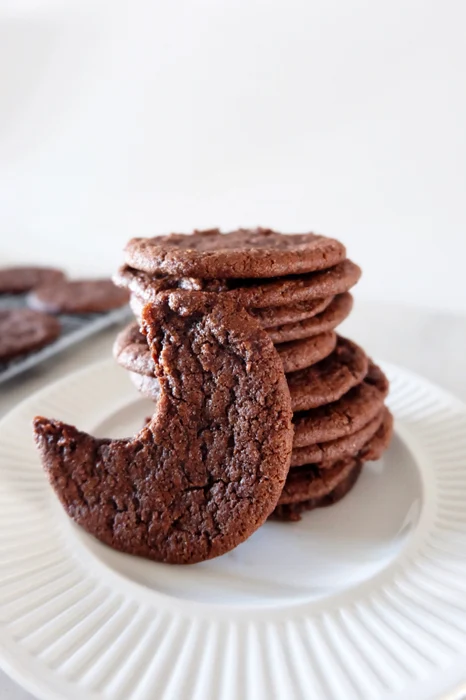
I know. This seems silly. You can run right out to the store, pop a coupla’ bucks, run home and you’ve got yourself chocolate wafer cookies. But heh, but this is a baking blog, not a grocery store blog!
And you have to understand, these cookies are killer. Holy bazoingas are they tasty.
 |
| Seriously. Right?! You can’t not make these. Too, the camera lies, they’re actually almost black. |
I get it though, taking a hand from the store is definitely a time and sanity saver, especially for things like graham crackers or vanilla wafers or chocolate wafer cookies.
Last summer, during some super hot weather, I was exploring no-bake dessert ideas because yeah, it was just much too hot. I am deranged and bake when it’s that hot anyway probably because I’m a perma-cold creature, but the notion of easy summer vibes associated with no-bake was quite alluring.
Henceforth, I rolled across several recipes calling for chocolate wafer cookies, of course, as one would expect.
Honestly, I’ve never seen them in a store or eaten them as a matter of fact, because yeah, cookie aisle avoidance and if I do end up in that aisle, my focus is sharp.
Years of prop shopping for theatre have practically beaten the ability to browse right outta me. Get in, get whatcha need, get out. Then again, I dislike grocery shopping immensely. Combined, heh, it’s usually an overly efficient, very brief excursion. Yes, and despite thorough lists, I forget things often due to my efficiency. Heh.
Anywhoooo….
Right, kept running into recipes using chocolate wafer cookies, like pies and tarts too along with the no-bake goodies. So, feeling lazy as in I do not want to run to the store yet again, ugh I feel like I’m always at the darn grocery store, why not bake them instead?
After trying one recipe and eh, it was ok (Mike thought they were great, I thought they were way too sugary and grainy), I came upon this recipe, Alice Medrich’s Real Chocolate Wafers over on Genius Kitchen and bam, done, wiiinnnnn-ner! Ho man, winner is an understatement.
The cookies never made it into a no-bake treat, truth be told, ahem, that’s how yummy they are. Mike came home from work that day, spotted them, his eyes popped wide full of glee and next thing I know, speechlessly, poof, a slew vanished.
The biggest reward here is that these chocolate wafers, man, they nail that spot-on balance between sweetness and rich chocolate, crunch and chew. Beware, they’re painfully easy to eat.
Totally worth the effort though these are not much effort, they take practically no time at all, but truly, I will never stink-eye you for going the store-bought route. Still, just try these. Trust me. You’ll be upping the ante on your pies, tarts, and no-bakers left and right now!
 |
| All the ingredients set and ready to go! |
Cream the butter solo in a mixer until it’s kinda frosting-like, a couple of minutes, then add both the brown and granulated sugars along with the vanilla. Cream that all together for about a minute or so.
 |
| Atypically fluffy, this creaming process. |
Next up, dump in the milk with the mixer running on low and stir that until nicely mixed.
 |
| Now it’s fluffy! |
Gradually tap in the flour mix on low speed and stir until it’s just combined, avoiding over-mixing though. A speckle or two of flour is perfect. Do make sure everything is combined, it’s a stiff dough that doesn’t want to be mixed by hand.
 |
| Yeah, it’s a pretty crumbly dough. Sticky but dry — nice oxymoron. |
 |
| Sort of a better shot of the dough; sorry, the light was changing on me fast. |
 |
| Roll ’em up tight! |
 |
| Gentle slicing motions here, although if you’re just using these for another dessert, pfft, who cares, cut ’em sloppy! |
 |
| I know, I didn’t do a very good job of slicing here. Not slicing all the way through was my problem. |
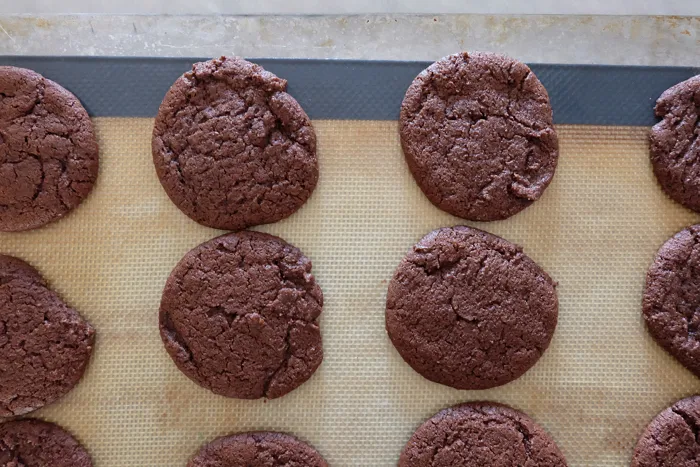
The sweetie pies will puff up a bit, look somewhat crackled atop, the edges puffed, set and drier when ready. They’ll deflate and flatten to a level thickness once cooled.
 |
| Voila! Yum!! |
Ideally, hide these right away to avoid eating every last one instantly. Heh.
 |
| Nooo, I did not accidentally put one in my mouth, why do you ask? |
 |
| Ok, yes, yes I did take a bite and I was in such a rush to eat the rest of it, that’s why that cookie is blurry. |
Note: This content originally appeared on Flaky Bakers.

Chocolate Wafer Cookies
Yield
40-45 cookiesPrep time
15 MinCook time
12 MinTotal time
27 MinSupremely delicious, the perfect combination of crunch, chew, sweet, and rich chocolate, this chocolate wafer recipe is a hands down winner.
Ingredients
- 1 cup (120 g) all-purpose flour
- 1/2 cup plus 1 tablespoon (47 g) cocoa powder
- 1/4 teaspoon (1.5 g) baking soda
- 1/4 teaspoon (1.5 g) fine sea salt
- 6 tablespoons (85 g) unsalted butter, softened
- 1/2 cup (107 g) dark brown sugar, packed
- 1/2 cup (99 g) granulated sugar
- 1 teaspoon (5 g) vanilla
- 3 tablespoons (44 ml) milk
Instructions
- Combine the flour, cocoa powder, baking soda, and salt in a medium bowl, aerating to mix with a fork.
- Add the butter to the bowl of a mixer and beat until fluffy and creamed. Add both sugars and the vanilla to the bowl and cream together on medium-high for about a minute.
- Turn the mixer to low and add the milk, stirring until combined nicely.
- Gradually add the flour with the mixer continuing on low until just mixed. The cookie dough will be quite stiff.
- Empty the dough into a piece of wax paper or plastic wrap and using the paper or wrap, form the dough into a log about 10” long. Avoid overworking the dough; use the paper/plastic to do the work of pulling the dough together and square up the ends. Wrap tightly and refrigerate for 45 minutes up to 3 days.
- When ready to bake, preheat the oven to 350° F (176° C) with a rack set in the middle. Grease a cookie sheet lightly, line with parchment paper, or line it with a silicone mat.
- Remove the dough from the fridge, unwrap, and with a serrated knife slice the dough into scant 1/4” rounds using a sawing motion to avoid flattening the circles. Place the rounds on the cookie sheet about an inch apart and bake for 10-12 minutes, rotating the cookie sheet halfway through the baking time.
- The cookies will puff and crackle a bit, the edges will look mostly set and drier when ready. They'll deflate and level out as they cool.
- Let the cookies cool about 2-5 minutes to firm up a bit then remove them to a cooling rack and continue baking.
Notes:
Adapted from Alice Medrich via Genius Kitchen.
Nutrition Facts
Calories
54.08Fat (grams)
1.98Sat. Fat (grams)
1.09Carbs (grams)
8.39Fiber (grams)
0.48Net carbs
7.91Sugar (grams)
4.73Protein (grams)
0.78Sodium (milligrams)
22.65Cholesterol (grams)
4.67Please see the "info" section for nutrition details and information about gram weights.
*The silicone baking mats are an Amazon affiliate link. Happy baking, thanks! Please see the "info" tab for more, well, info.


Share your thoughts :
Spam is not good for baking. Please don't leave any, thanks.